Creating a schedule for a competition is one of the most important steps in organizing martial arts events such as BJJ, MMA, or wrestling. Proper preparation will ensure that the competition runs smoothly and without delays.
Running an event
The MartialMatch application is flexible when it comes to creating schedules. Planning the schedule is one of the stages of organizing competitions, these are:
- registration of competitors
- brackets
- mats
- planning: one or more schedules
- assigning brackets to mats in the selected schedule,
- generating fights in schedules based on brackets,
- conducting fights.
The important decision we have to make is the number of schedules.
- Each schedule contains its fights, brackets, and mats.
- One schedule is isolated from another, which means that fights from one schedule cannot be assigned to mats from another schedule.
- At the same time, we can only conduct fights from one active schedule.
Adding schedules
Schedule for competitions are added under the Organization tab, and then Manage schedule.
You will see the following:

You decide how many schedules to create and how to assign brackets to them.
- Events can be divided into several days. "Day 1", "Day 2".
- If we have one-day events, one schedule is enough.
- There is nothing stopping us from dividing one-day events into several schedules. We then conduct fights from one schedule, and then move on to the next.
Create a schedule by clicking Add new, then enter the name and start time of the schedule.
Planning the schedule
The next step is to assign brackets to mats in the selected schedule.
Click on the name of the schedule you want to edit. You will be taken to the schedule planning interface:
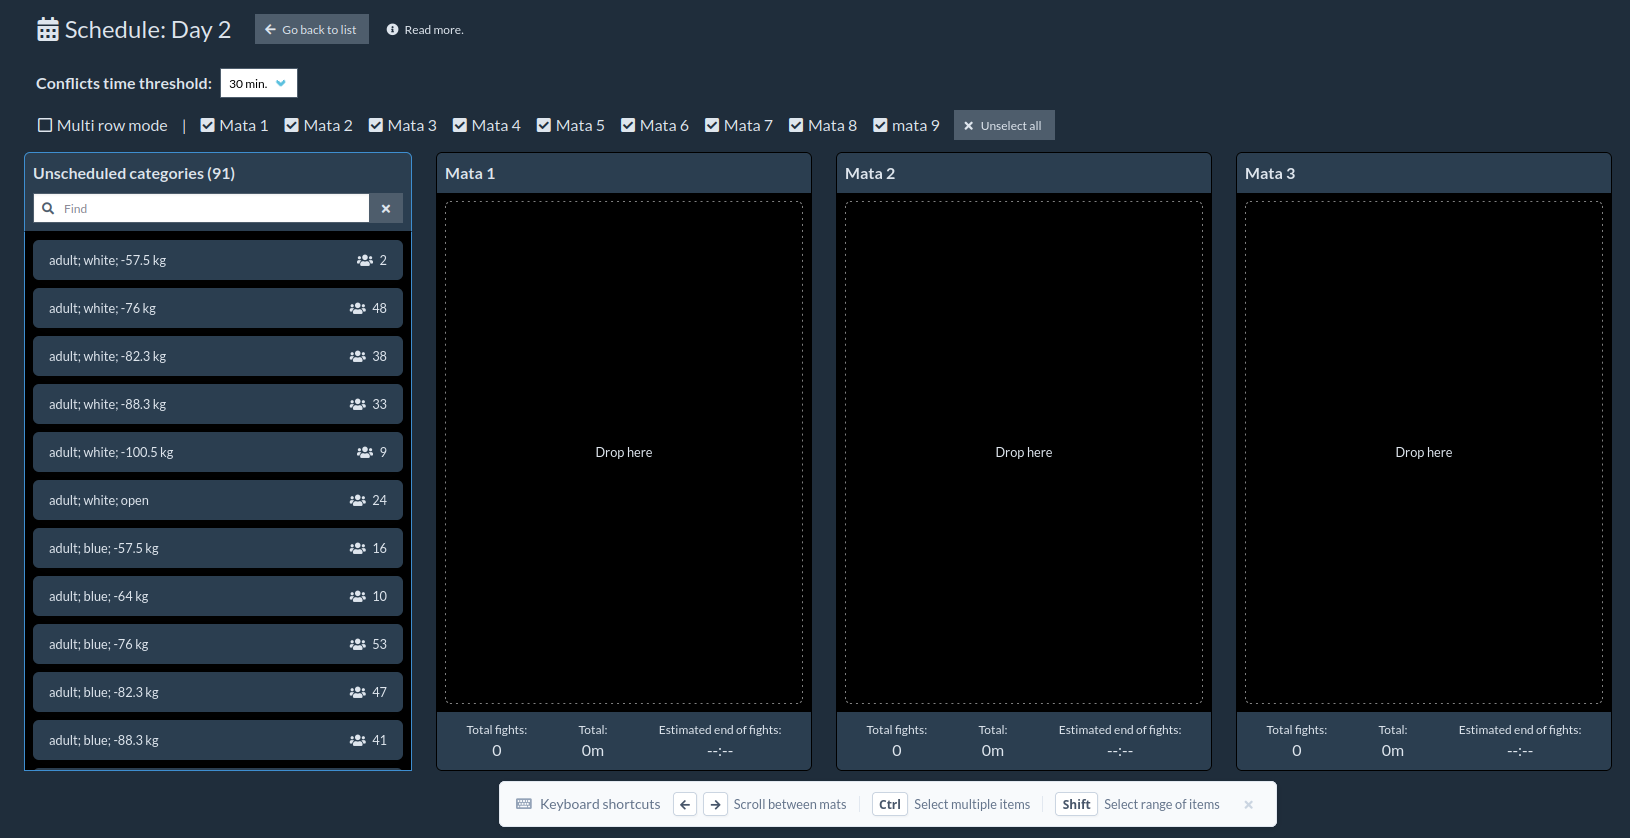
Planning the schedule consists of several steps:
- choose the categories/brackets you want to assign to the mats,
- choose the target mats,
- (optionally) choose the way in which one selected category is to be divided.
Choosing categories
The system allows you to easily select one or more categories at once that you want to assign to the mats.
You can scroll through the list and select categories one by one or use the search input, you can search for categories that interest you, and select them using function keys. Ctrl - if we want to select individual categories or Shift - if we want to select a range of categories.
Category search
In order to automatically select multiple categories, you should use the search input. You search for categories, enter keywords that are in the category name.
For example, having categories:
adult; white; -64 kg
adult; white; -70 kg
adult; white; -76 kg
...
adult; blue; -64 kg
adult; blue; -70 kg
adult; blue; -76 kg
To assign all white categories to the mats, just enter "white" in the search input, and the system will automatically find all categories that match this criteria.
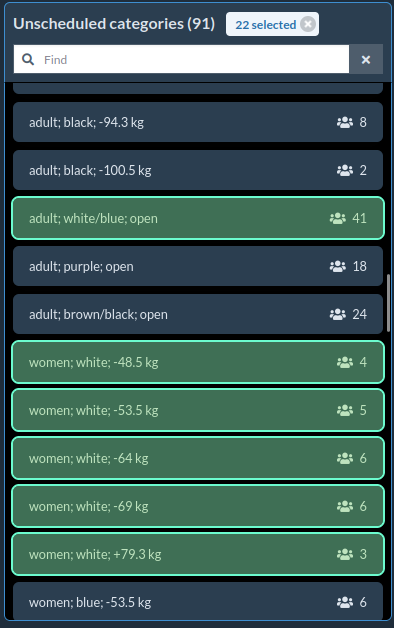
Then click the first category and while holding the Shift key, select the last category. This will cause the categories that are visible to be added to the selected categories.
If we clear the keyword from the search input, the system will display all available categories again, but only the previously selected ones will be highlighted.
Choosing mats
After selecting the categories, you can manually move them to the selected mat by dragging them with the mouse cursor. If you want to assign categories to multiple mats, you can do this using the Distribute button.
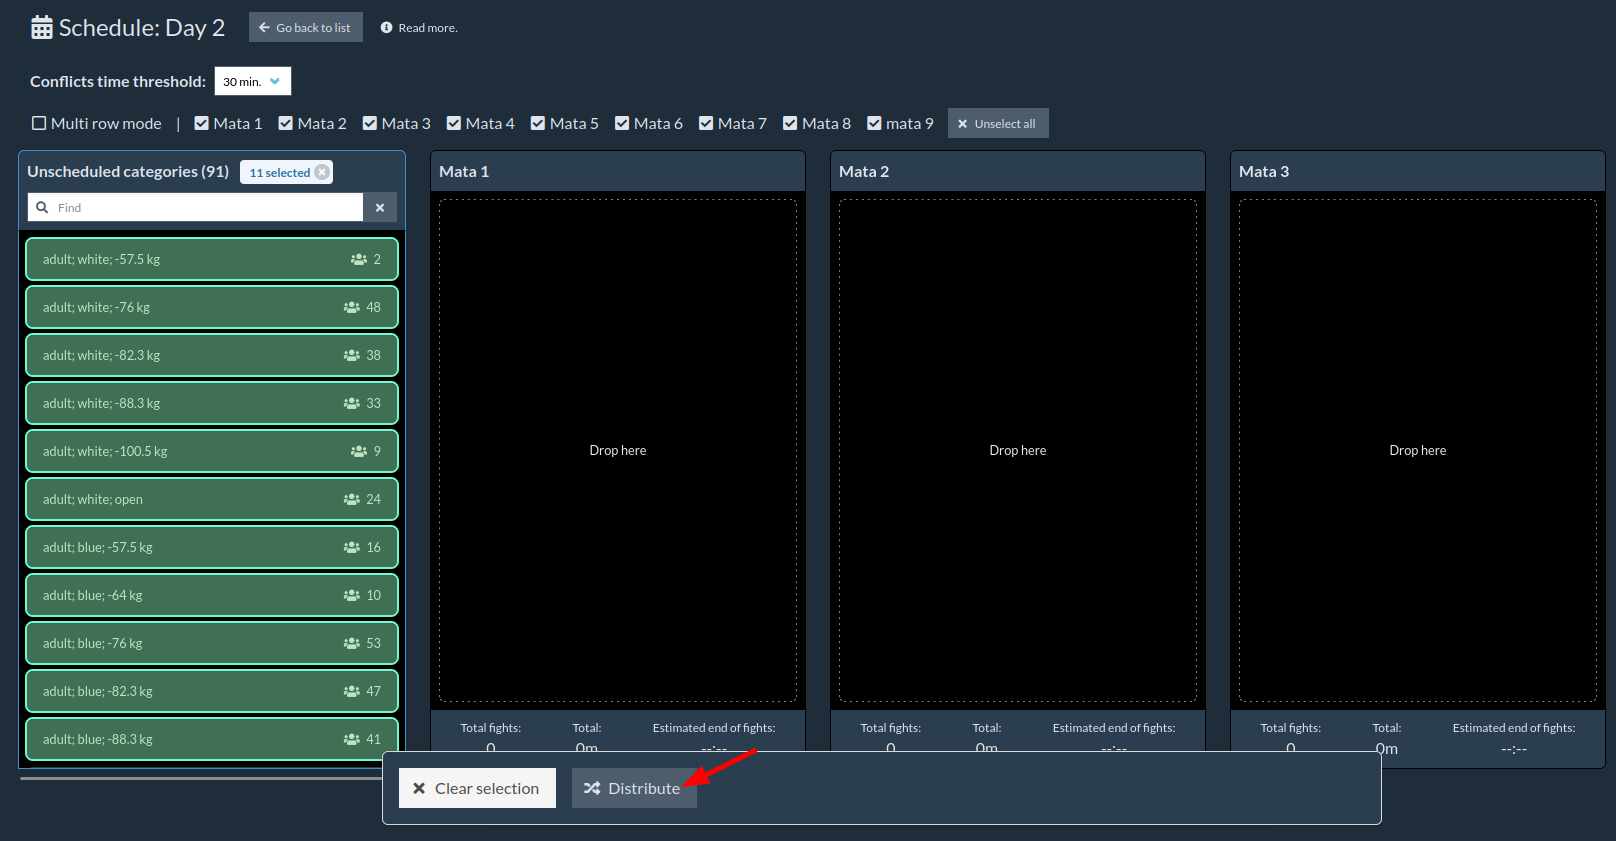
A window will appear with the selection of mats to which you want to distribute the selected categories.
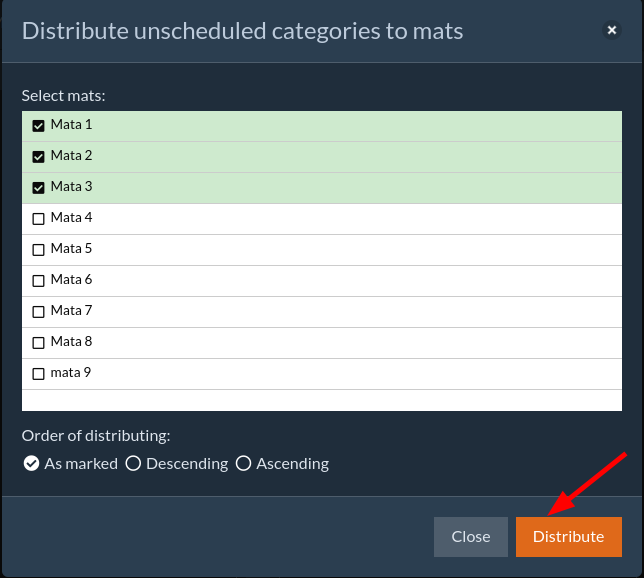
Select the mats and click Distribute.
There are several variants according to which the system will then add categories:
- As marked - when selecting multiple categories, they will be added in a balanced way to the mats, in the same order as you marked them,

- Descending - if you have multiple selected categories, the largest categories will be added first,

- Ascending - in this case, the system will start with the smallest categories.

Adding ascending/descending applies only to selected categories. If we then select another set of categories, you can choose a different way of adding.
Slice categories
To divide one category into parts, select it and click the Slice button.
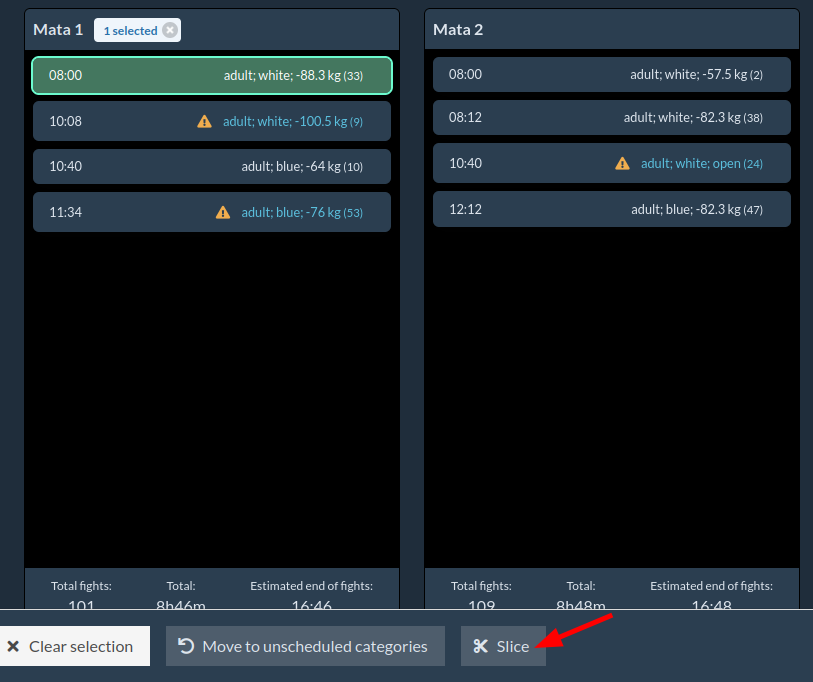
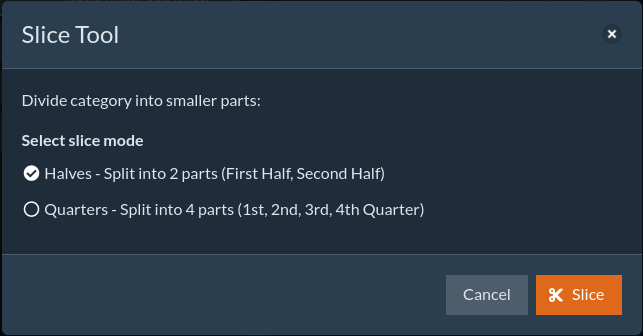
You have two ways to slice the category:
- Halves - the system will divide the category into equal parts (first half, second half),
- Quarters - the system will divide the category into four parts (1st quarter, 2nd quarter, 3rd quarter, 4th quarter).
Schedule preview
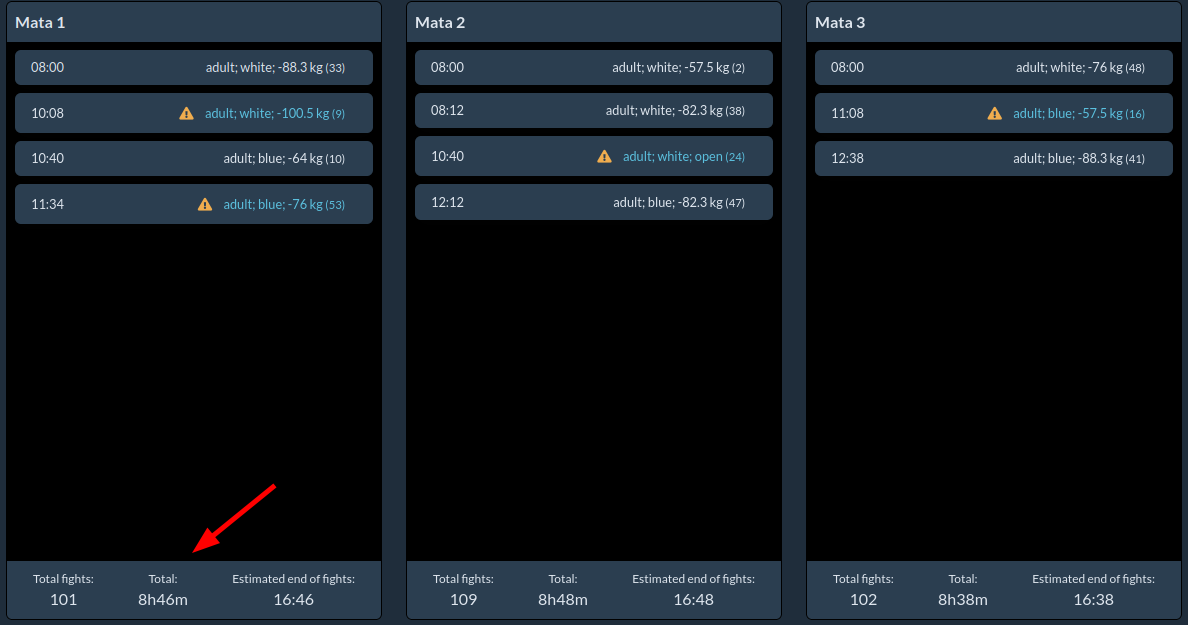
The schedule is updated in real-time as categories are added to the mats.
The most important features are:
- the ability to drag categories to other mats,
- the ability to drag categories and change the order on one mat,
- warning about potential conflicts that may occur in the schedule.
At the bottom of each mat, we see a summary with the number of fights, estimated duration, and estimated time of completion.
Conflicts in the schedule
The system displays potential conflicts that may occur in the schedule.
Conflicts occur when the same competitor fights in two categories and when both categories have fights at the same time. This can lead to a situation where the competitor has to be on two mats at the same time 😁.
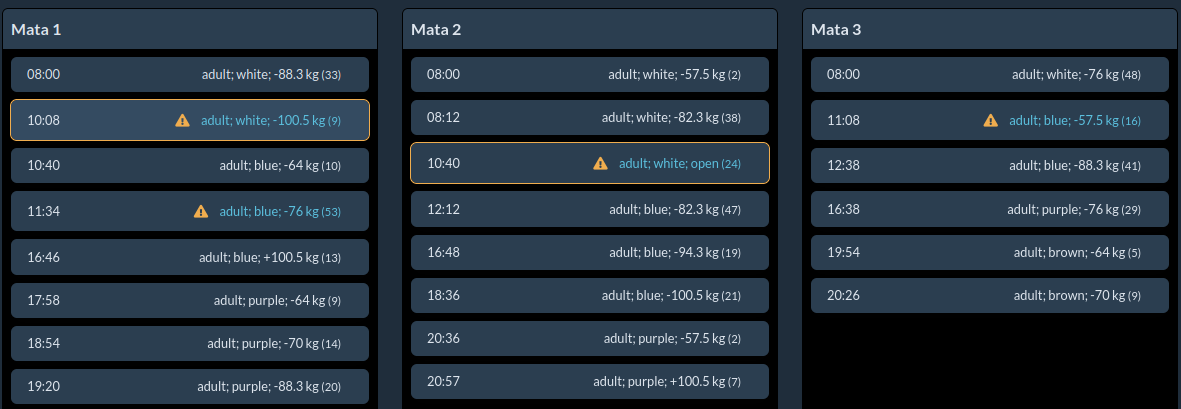
The system suggests that we pay attention to these conflicts and possibly move categories to other mats.
- To preview all conflicts, click on the warning above the mats.
- Clicking on the category that is in conflict, the system will highlight the categories that are in conflict with it and on which mats the conflict occurs.
Conflict time threshold determines the time gap between categories for the system to identify a conflict. For example, if we set the threshold to 30 minutes, the system will show a conflict when fights from two categories start within 30 minutes of each other, and we have the same competitor in such categories.
Sharing the schedule
Once all categories are assigned to the mats and conflicts are resolved, you can share the schedule with competitors.
For more information, see the dedicated guide here.